Monday, 25 March 2019

Welcome – Medley with Mandala and Watercolour Embellishments

Hello friends,
Warm welcome to all the readers. Today I am sharing an interesting medley of some wonderful new products, that are a part of my Itsy Bitsy  DT kit for this month. The post is also my Design Team post for the brand. 

In the picture above are some of the products from my kit, that I have crafted with to make a WELCOME BOARD. Have also used the beautiful Mandala stencil with different mediums, in different ways on different surfaces. 
Some interesting images of the Welcome Board. 
Has some decoupaged tiny flowers, butterflies and bird. 
Water colour effect given on Welcome cut out using distress inks. Also gave a stitched line effect with black permanent marker.
Added fine glitter on flowers and welcome cut out when the varnish was still wet.
Stenciling done with modelling paste mixed with chalk paint colour and have used the Mandala Decor stencil. 
The final look
 Hope you liked my Welcome medley with mandala and watercolour elements.Here's the link to the detailed step wise picture tutorial of the creation. 
Will be exploring the watercolour embellishments, in the next post as well. For now let me quickly take you though my creations using the mandala stencil. The mandala decor stencils from Itsy Bitsy are huge, overall 14 x 14 inch (mandala – 12 x 12 inch ),  available in 4 beautiful designs. They can be used to design various decor products like wall pieces, lamp shades, clocks, cushion covers, on furniture and so on. However, it is not necessary to use the stencil as a whole. There are smaller elements within the design that can be used on smaller surfaces as well, making the product versatile. Have used the stencil design – Glamour Bloom.
Stenciling with chalk paints on fabric-

Stenciling with sparkle paste on burlap journal cover- 
Have also used 3D pearl drops for added dimension and effect. 

Stenciling with embossing texture paste on paper envelopes-


A detailed information on stenciling with different mediums is also shared in the above link. Do visit and be a part of my explorations with Mandala Decor stencil.

Hope you like my creations. Happy Crafting.


Create, Express, Enjoy !!!
Vaishali Khandwala


Wednesday, 13 March 2019

Home Decor- Cast with Cement and Love

Hello friends…Hope all are  crafting great !!!!  
I am very excited to share my creations using Itsy Bitsy's home brand, Little Birdie’s Craft Cement. The post is also my Design team post for Itsy Bitsy. Being an architect, have learnt all about cement and concrete, but never worked hands on with it. So in the middle of my excitement and concerns, ended up working on two projects …what if one cracks ???
To my happiness both the projects turned out great….no cracks and perfect unmolding. Craft Cement is a great material to create decor products with organic look. Have created two  home decor products  – a soap dispenser and a  key holder. 

Some interesting pictures and close ups of soap dispenser-


Ceramic knobs make great embellishment for the dispenser along with
 beads and succulent flower.

Combination of Glass and Cement is elegant. 

Explored stenciling with cement slurry and it turned out interestingly great.
Also check out textures created on plastic glass with cement mix and bubble wrap.

Working with cement can be addictive. Had learned about cement concrete reinforcement. Reinforcement is used when casting larger cement structures like columns, beams etc. Also used for shaping to create cement sculptures. Wanted to give it a try in a smaller way here and this gave shape to the next  home decor piece – a key holder, for which I have used steel wire mesh as reinforcement. Wire mesh is easily available in any local hardware shop.

Here are some details of cement key holder-


Have used wire mesh as reinforcement to hold the two cement panels. 

Wire mesh enhances the raw look of cement.

Decoupage and gold highlights compliment the natural look of cement.

Here's the link to the detailed stepwise tutorial of the cement creations.Read till the end to know how both can be used differently as well !!!

Hope you liked my Home Decor Creations- Cast with Cement and Love,  for a ‘Home with Love’!!!

Happy Crafting
Create, Express, Enjoy !!!
Vaishali Khandwala


Sunday, 24 February 2019

Bird House Table Lamp - A play with mix media products

Hello friends, Hope all are doing great. 

I am super excited to share my creation - Bird House Table Lamp !!!! The creation is also my design team project for Itsy Bitsy.


I had great fun working with mix media products, in this project. Have a video tutorial explaining the detailed process, that  I completely enjoyed....Also it explains effects and uses of different mix media mediums.
Here's the Link

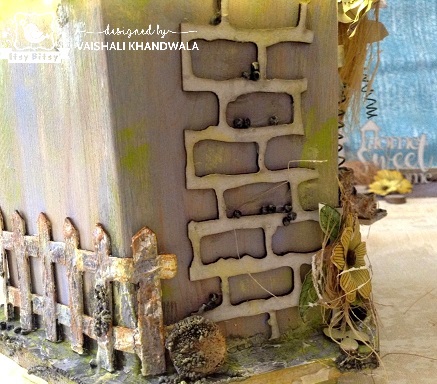
Recently, Itsy Bitsy  added wonderful wooden bases from Ac Moore and they are a treat for a crafter like me, who loves altering objects and make utility products. So this time, it was altering the pinewood bird house to make a table lamp.  Wanted to give the house a rustic look. The wonderful  mix media mediums, worked great to get the desired effect. 


Colouring done through colour wash and dry brushing technique.  Have used different Chalk Paint colours to do so, maintaining the colour scheme as grey, yellow, blue and green.


I wanted to add more dimension and depth to the house ....create more space for the birds to perch....more the merrier !!! To do so, I have used  some general craft supplies. Cut them to the desired size and adhered them to the bird house, using heavy gel medium matte. Created a balanced composition with the elements.


Used Fiber Paste, for rustic effect and highlighted the fibers with Tinted Metallic Paint . 


Used Embossing Texture Paste,  to add further textures and create oneness.


Crackle Paste cannot be missed when it comes to create old, rustic look !!! Used it at various places.


Dimensional  Decoupage done using Decomagic Decoupage Glue, to make the chirping birds .....


Embellishing done with handmade beautiful paper flowers, pre -primed chipboard shapes, sisal fiber and mini wooden slices from the store.


Do check the video tutorial for the detailed step wise procedure and  let me know how you liked my play with wonderful mix media products of Little Birdie- Itsy Bitsy's home brand.  I loved using them to create this home decor bird house table lamp. The lamp enhances the table space and brings in warmth and cheer to home.


Happy Crafting

Create, Express, Enjoy !!!

Vaishali Khandwala.


Saturday, 9 February 2019

Love is in the Air- Reverse Image Transfer with Crackle Effect

Hello friends,Hope you all are doing great !!!! 
Sharing today my Design Team post for Itsy Bitsy. All products used are from the store. I have a beautifully crafted glass plate, that makes a perfect Valentine’s Day gift for your loved one. It can also be used as a decor piece, after all the season of love never ends....  Love is in the Air, throughout the year !!!!

Have you tried reverse image transfer? It’s very interesting to work with image transfer technique on the reverse side of transparent surfaces !
Here, I have used Little Birdie Two Step Cackle Medium and stenciling work along with reverse image transfer technique to make this decor plate. So let’s get started…..
I have altered a plain, circular glass plate approx 7.5 inch in diameter. The plate was not being used much and I saw a wonderful scope for a great makeover.  Glass plates of different sizes and shapes are easily available in any local glassware shop.  It’s very important to clean the plate properly before you start working, making sure that there are no finger marks or glue marks from sticky labels. Soaking in warm, soap water helps in removing labels with ease.
As we are doing reverse image transfer… the work needs to be done on the back/reverse side of the glass plate. I started working on the edges of the plate first. Have done stenciling using Little Birdie chalk paint – Whipped Seafoam and the stencil  ‘Feathery Leaves’ with a Mont Marte stencil brush.
Tip- Using a stencil brush gives crisp stenciling. Make sure you do not add water to the paint  and the brush is dry too.

Added some more patterns using chalk paint Lavender Blush, gold acrylic paint and stencil ‘Ethnic circles’. Love this stencil… Do check out the recently launched, beautiful stencil designs!

Next step was to work with the 2 step crackle medium to get a crackled effect on the edges, over the stenciled area.  Two step crackle medium, as the name suggest has two steps – applying the base coat medium and applying the top coat medium. The reaction between the two mediums creates transparent cracks, that are highlighted with the colour of one’s choice.  Remember there is no layer of paint applied between the two coats.
First, I have applied the base coat with a synthetic hair flat brush, using a  dab method of application. The base coat is milky in appearance. Have a look below….


It can be speed dried with a hair dryer after about 1/2 hr of natural drying. The base coat dries clear. It feels tacky even after drying. That’s completely fine. Basically the milky look should turn clear as you see in the picture below.


Now, is the time to apply the top coat.  The top coat is a transparent medium. The top coat has to be applied with a dab method of application and allowed to dry naturally. Do not speed dry at this stage.  As the top coat dries, the cracks will form automatically.
Tip- The thickness of top coat determines the size of cracks. Thicker coat gives larger cracks and vice versa.

The stenciling done is seen through the crackled area.  So basically the two step crackled medium is used when you want cracks over a painted/ stenciled/ decoupaged or any given finished surface, such that you see the finished surface through the cracks. Hope this explains the process about how it works.
The cracks are transparent and need to be highlighted with oil/acrylic paints. I have used gold oil paint and  gently applied it over the crackled surface with a soft cloth. The paint will get inside the cracks. The excess should be wipe off with a clean piece of soft cloth.
Tip- Work in small areas at a time. Do not use damp cloth.

Love the crackled effect !!! It’s time to transfer the image now. We are doing image transfer on the back side of glass plate. So unlike working from front, do not use a mirror image. Hope that makes sense.


I have taken a laser printout of the image in the required size so that it fits in the center of the glass plate. Trimmed the extra white areas around the quote and transferred the image, using Little Birdie Instant Image Transfer Gel….a wonderful product from Itsy Bitsy’s home  brand


Below is the final look of the transferred image after removing the layers of paper. It takes only about 1/2 hr to transfer.  For more tips and detailed procedure of instant image transfer, you can refer to my earlier post on the Itsy Bitsy blog here


You can see some random marks of the transfer medium around the quote. That will be seen. Either you can play with it in your creation or do not trim the extra white areas, meaning in this case, use the entire circular image. Once a background colour is given,  it looks fine.
It’s reverse image transfer so the steps are reverse. First  transfer the image and then apply the base colour. Whereas when working from front,  first apply the base colour and then transfer the image. It’s an interesting concept that I enjoyed exploring.  I hope you give it a try too.
Next step is to bring in colours. I have done some colour blending using chalk paints on the  edges of the plate.

At this stage, I liked it the way it was and did not want to add any colours in the center.  You can add colours of your choice in the center  if you wish.  So finally decided to just give it a backing with burlap sheets, and bring in a textured effect. Burlap sheets from the store come with backing. They are one of my favorite product.

Had altered the stenciling a bit while working  to get the correct composition. Finally added gold paint to the rim and embellished the plate with beautiful handmade flowers and a  pre-primed chipboard.  All the embellishments and burlap sheet are adhered using silicon glue…again one of my favourites! Silicon glue helps to stick all materials with ease.

A closer view of the project. I have applied decor varnish- matte on the entire rear side of the plate to seal it.

Do let me know your views on my project with reverse Instant Image Transfer technique and 2 step Crackle Medium.
The project also goes as my inspirational post for the current month’s Itsy Bitsy blog challenge … Anything goes with Instant Image Transfer Gel. Looking forward to your wonderful creations !!!
Happy Crafting.
Create, Express, Enjoy !!!!
Vaishali Khandwala.
List of materials used can be checked on this link